NOTE: The Site Reprot Pro logo can be replaced with your own company logo once you have purchased the full version of the App using the In App Purchase. View the Purchase Site Report Pro article to learn how to do this.
You can add your own company logo as follows:
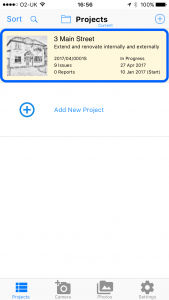
On the projects screen, click the the project to be edited.
The project screen containing all the project issues (if any) will be displayed.
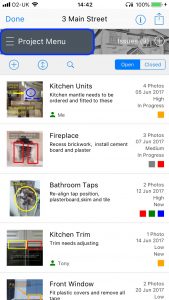
Click Project Menu
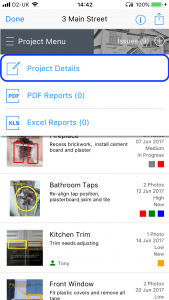
Click Project Details to reveal the details page.
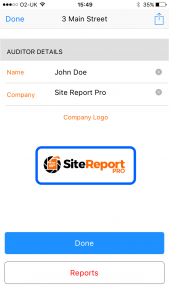
Scroll to the Auditor Company Logo section near the bottom of the page.
Click the existing logo image.
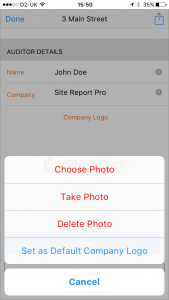
Choose the relevant option of the menu that is displayed and select your logo image.
Click Done.
1. Click the required project
2. Click Project Menu
2. Click Project Details
3. Click on existing logo
4. Select relevant action
The logo will be cropped if its width is three times greater than its height.
To prevent cropping under these circumstances, use a graphics program (e.g. photoshop) and place your logo in a different sizes ‘frame’ (e.g. a square) where the width is no more than three times the height (i.e. max ratio of 1:3).
Save the new logo image and upload it to Site Report Pro.

You can also set the current Logo to be the default company logo for all projects.
After completing the above steps to set your logo for a project, click the logo again and select Set as Default Company Logo.
